Heading for success.
- Summary: Use headings whenever possible to organize content in documents, email, and webpages.
- Who it helps: Individuals who use assistive technology or have cognitive disabilities.
- Additional benefits: Readers who are tired or in a hurry can find relevant content more easily.
Headings organize content into chunks of related information. They are typically short summary statements about the content following the heading. We typically style headings to stand out with larger letters or bold, even colored, text. Headings help your audience scan your website, brochures, emails and other documents to find relevant information quickly.
In addition to styling headings to visually stand out, we also need to mark headings to help assistive technology users navigate to them. Marking a heading is simple to do. But it makes a huge difference in the ability of users who are blind, have cognitive disabilities, or rely on the keyboard. Visual and correctly marked headings increase your audience’s ability to navigate and read your content.
What can I do?
Use the following strategy when to establish headings and structure in your content:
- Group related information and place it under a heading.
- Style the heading so it stands out visually from the other text.
- Add markup to the heading whenever possible to support people who rely on the keyboard focus, use a screen reader or other assistive technology.
- When you have heading numbers (typically 1-6), use this nesting strategy:
- Overall Title: Heading 1 (
h1) - Section Title: Heading 2 (
h2) - Subsection Title: Heading 3 (
h3)
- Overall Title: Heading 1 (
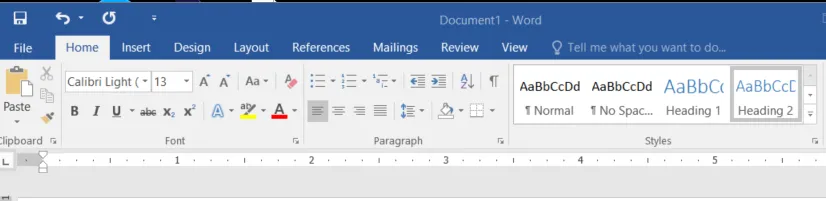
Adding headings in Microsoft Word
- Highlight the section heading and on the Home Toolbar, under Styles, select the appropriate heading level. You can also start by selecting the heading level and then writing.
- If you do not like the way the heading looks, you can style a specific heading. Highlight the text and change the font, style or color to your choosing. Then, right-click the specific heading style in the ribbon, and select “Update Heading to Match Selection”.
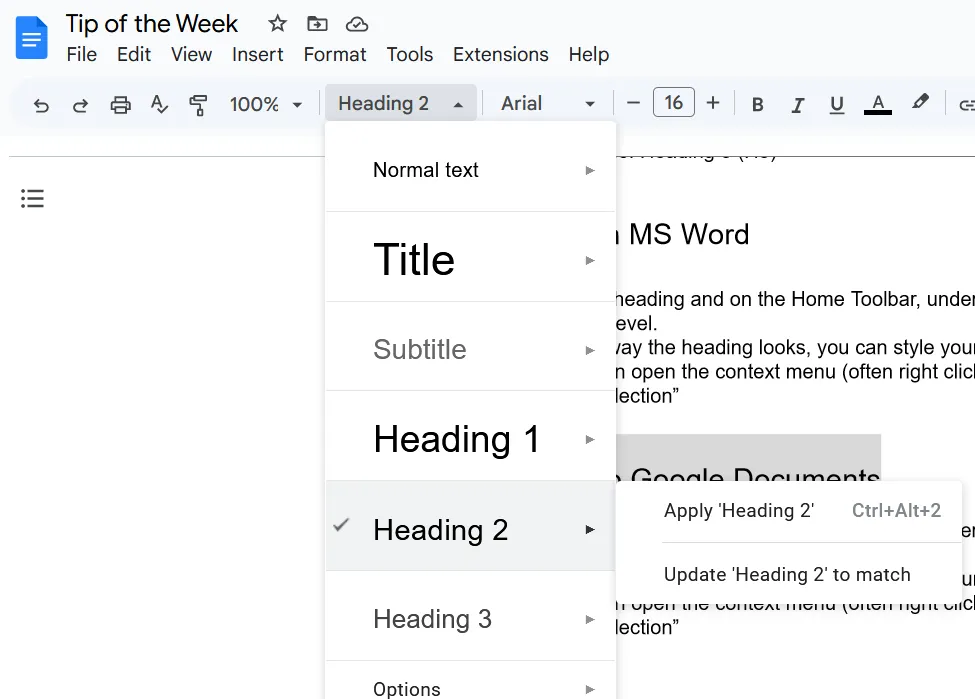
Adding headings in Google Documents
- Highlight the section heading and on the Home Toolbar, under Styles, select the appropriate heading level.
- If you do not like the way the heading looks, you can style a specific heading. Highlight the text and change the font, style or color to your choosing. Then, open the style menu, hover over the specific heading style and select “Update ‘Heading #’ to match”.
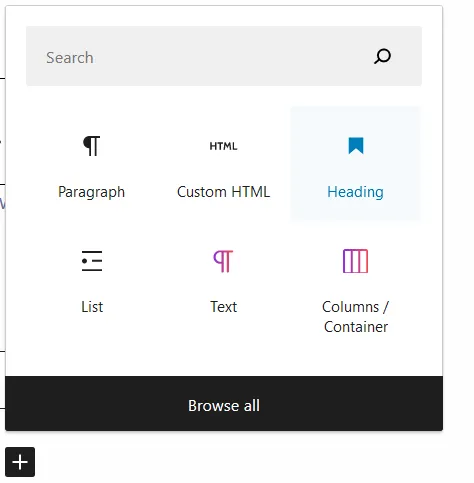
Add headings in Wordpress
- Add a heading block. If you’ve added text as a paragraph, select the text for the heading and then transform it to a heading.
- Wordpress will assign a heading level. Often this will say H2. You can change the level by selecting the assigned heading level.